Thursday, August 11, 2011
Large Tote with Rounded Opening from Make-it, Love-it
LARGE TOTE WITH ROUNDED OPENING FROM MAKE-IT, LOVE-IT
.
.
And the tote is great as is……..but I just had to throw a few flowers (from this tutorial) on the front.
But, of course, they’re optional.
.
.
And added a printed fabric for the lining.
.
.
.
The bottom corners are squared, proving more room in the tote.
.
.
And that’s that. They’re quick to make, easy to carry, and big enough to stuff full.
.
.
.
Would you like to make your own rounded opening tote?
.
First of all, my outer fabric is called Duck Cloth. It’s super thick and sturdy canvas-y material that gives totes a great shape. The inner fabric is just a woven cotton. (Bought them at Joann’s)
.
To begin cut out two 19 x 19 inch squares out of your outer fabric and two 19 x 19 inch squares out of your lining fabric.
.
Then, find the center along one edge of your outer fabric and mark it. Then measure out 3.5 inches in both directions and mark it with a pen. (I measured out and marked 3 inches in both directions in the image below but then changed it. Do 3.5 inches.)
.
Now grab a bowl with about a 7 inch diameter (or cut out your own circle) and place the curve of the bowl between the 2 outer marks.
.
I didn’t wanted the circle quite so rounded (a bigger bowl would have fixed this problem) so I left some room between the bowl and the outer marks………
.
……..and then traced around the bowl, stopping about an inch before the edge of the fabric.
.
I then curved the line more outward to give that section of the fabric a bit of a straighter line, rather than continuing with the curve of the bowl. Like I said above, a larger bowl would have helped. Darn afterthought. :)
.
Now, cut out the circle shape…..
.
…….and then place this main piece (not the cut out piece, in case you don’t center it just right) on top of the other square pieces and cut out the same shape.
.
Now, place the outer pieces together with right sides together and sew them together along the sides and bottom (1/2 inch seam allowance). Then zig-zag (or serge) the raw edges and trim if necessary. Do the same with the lining pieces.
..
Now, to create the bottom squared-off shape…….grab one of your bottom corners.
.
And pull the front of the fabric away from the back of the fabric like shown……
.
Then turn the fabric over on it’s side and make the tip nice and pointy while lining up the seam that’s now running along the top, even with the seam that’s running along the bottom. Just feel it with your fingers and line both of those seams up.
.
Now, measure down from the point, 2 inches and mark it with a pin.
.
Then sew a straight line right across……..making sure it hits 2 inches down from the point.
.
Next, cut out 2 long strips of fabric that are 22 x 3 inches. Fold them in half lengthwise, with right sides together, and sew along the long side using a 1/4 inch seam allowance. Turn then right side out and iron flat.
.
Next, turn your outer fabric for your tote right side out and pin a strip to the curve of the front side of the tote and one to the curve of the back side. Measure down 1.5 inches from the top edge and pin your strip with the raw end facing up. (Make sure that the strip isn’t twisted at all.) And pin the strip ends in place about 3/4 of an inch past the edge of the curve of the tote. You’ll see why later. (And use two pins for each end, to keep the strips from moving before you sew them in place.)
.
Now, with your lining fabric still inside out, slide it over your outer fabric (that’s now right side out)…….
.
…….and keep pulling it up until the top edges are even. Make sure the handles are tucked down inside and then pin all along the upper edge.
Now sew all along the top, using a 1/2 inch seam allowance……….leaving about 5-6 inch gap along one side (near the side seam of the tote).
.
Now trim the corners off at the top of each curve……
.
……..and clip each curve. (Read here for more info on trimming and clipping.)
.
Now stick your hand down in the opening and pull out the outer fabric and shove the lining back down to the inside of the tote.
.
Now, iron the upper edge nice and flat. Be sure to tuck the edges of the opening down towards the inside a 1/2 inch and iron flat. Then top-stitch all along the upper edge about a 1/4 inch away from the edge.
.
Then, create little squares with ‘X’s’ through them right below the edge where the straps were attached. This will help make those strap more sturdy, especially if you’re going to put heavy things in your tote.
Now, fold your straps in half, towards the inside of the bag and sew right along the edge. Start and stop about 1 3/4 inches from the end of each handle.
.
This just gives the handle a better shape and make them easier to grab and hold.
Now, if you want to add flowers to your tote, make them just like the tutorial here. However, I made these flowers using fabric circles that were 2.5 inches in diameter. And I also didn’t hand sew the few extra scrunched circle pieces to the top, like shown in the tutorial mentioned. I wanted the top of the flower to be flat…..so I left them off.
.
And then machine sewed each flower right to the front, sewing through the center section of the flower. You can also hand stitch them in place, if desired.
.
And that’s it.
.
Your tote is done.
.
And ready to be filled.
Posted by JReneeMiles at 6:23 AM 0 comments
Wednesday, August 3, 2011
DIY Baby Gift ~ Portable Growth Chart Kit FROM WHIPPERBERRY
DIY Baby Gift ~ Portable Growth Chart Kit FROM WHIPPERBERRY
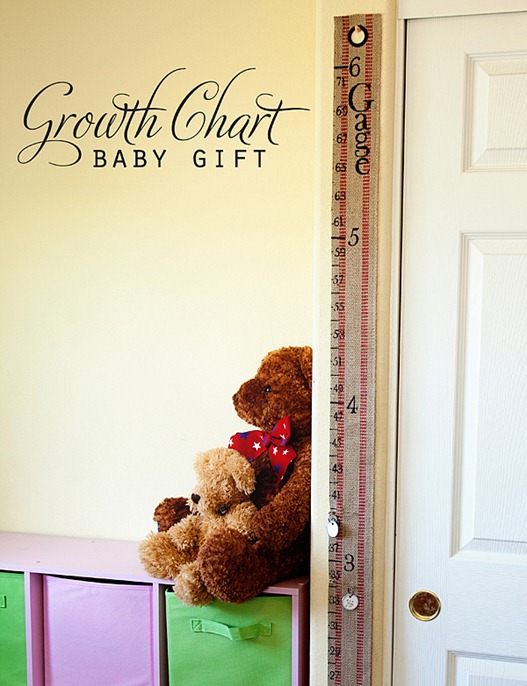
I grew up with a Mom who religiously made those cute little tick marks inside a door frame every year to mark our growth. Sadly when we moved we didn’t get to take the door frame with us. Sooo, I thought I would make a growth chart for my kiddos that can stay on the wall or be tucked away and taken out on special occasions. Here is what you need…
- Jute Webbing {I got mine at Wal-Mart for $2.97 for 6 ft.}
- Sharpie Marker & Sharpie Pen
- Key Tags {you can find these at most office supply stores}
- Large Safety Pins
- Measuring Tape
- Ruler
- Stencil
- 1 large grommet
I started by measuring the jute webbing and marking off for each foot…
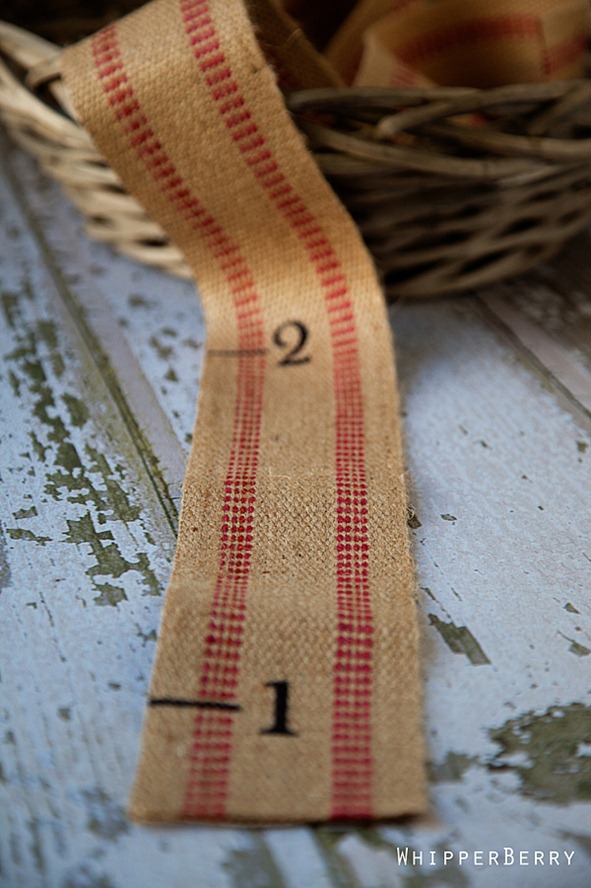
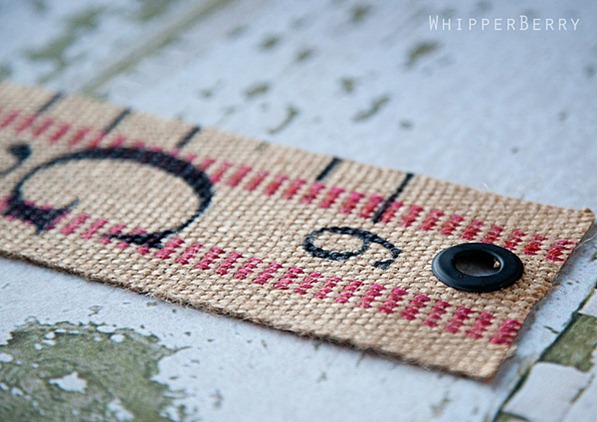
I then marked off each inch…
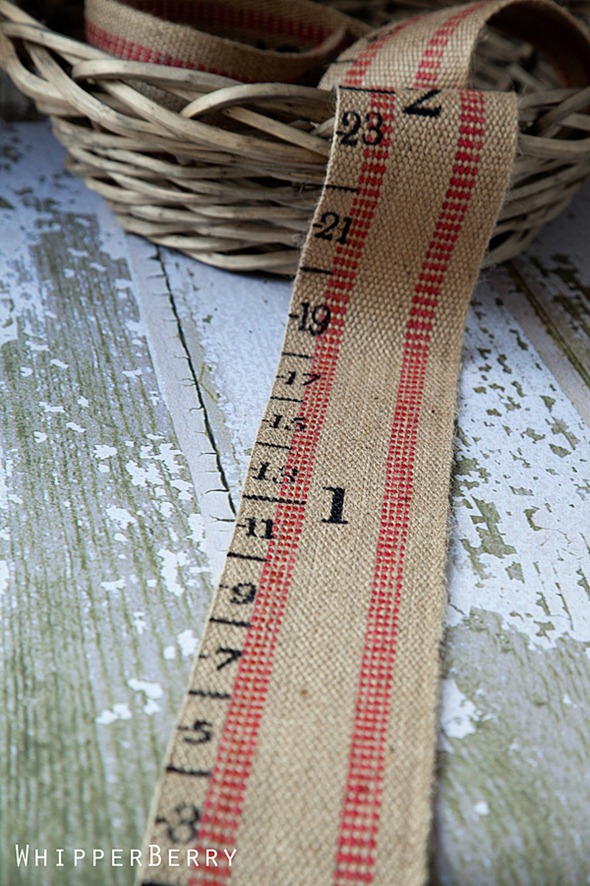
I made mine 6 ft. because I want to hopefully keep up the tradition through college for my little guy {that is if he will let me!}
Won’t it be a fun gift to pass on to his wife when they start to have kiddos of their own.
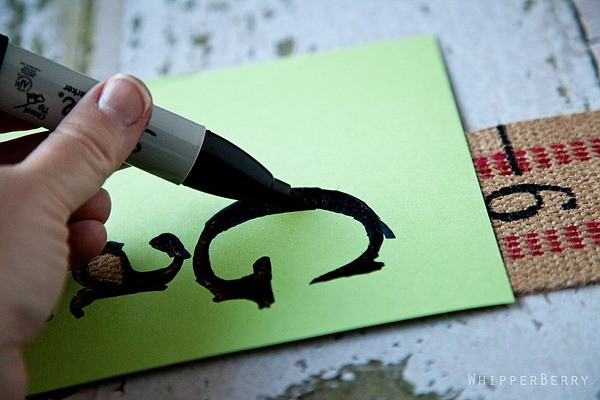
Anyway… once you have the tick marks all you have to do is use a stencil to stencil on the numbers. I created mine using my Silhouette and some card stock.
Stencil on the numbers and your kiddos name…
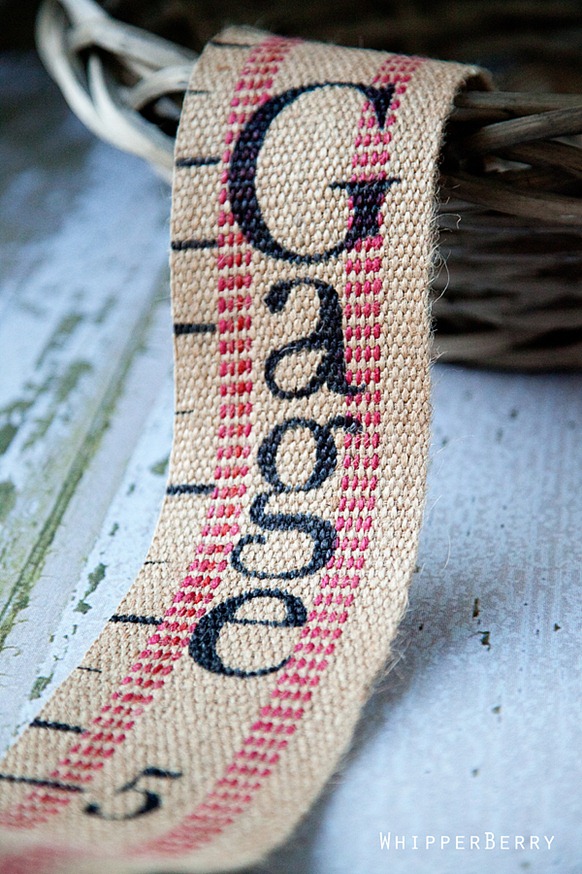
Next using my grommet tool I added a grommet to the top…
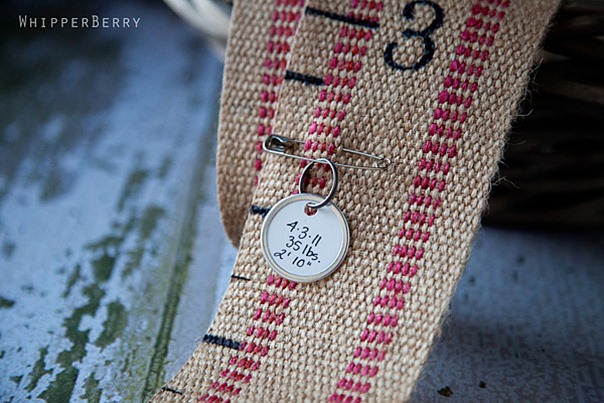
Now, all you have to do is put together the kit for the gift. I use key tags that you can buy at the office supply store to write all of the pertinent information on and then affix it to the chart with a large safety pin…
The nice thing about this is that you can roll it up and store it in the box when you don’t want to have it out and the pins and tags stay protected and in place.
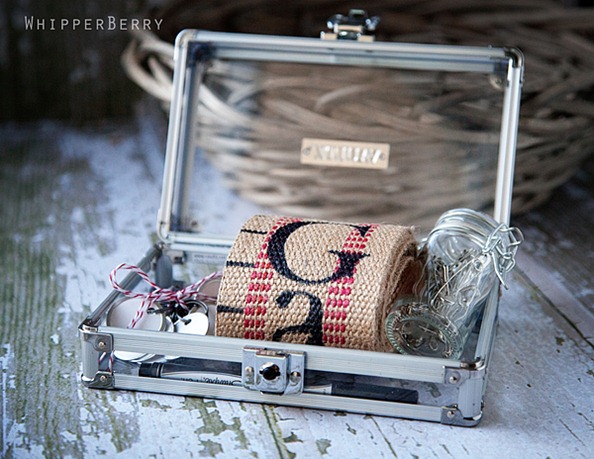
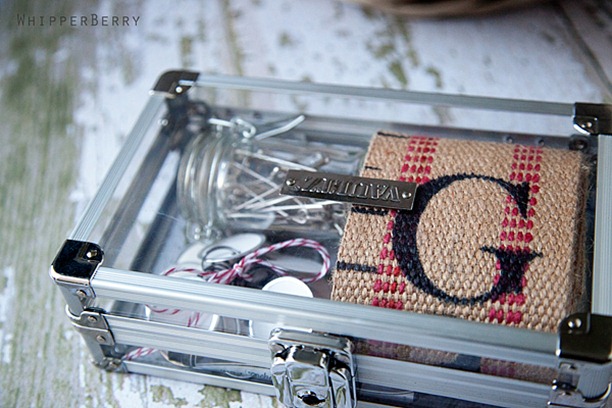
For the gift, I found a fun box at Target and put together a little kit…
… with safety pins and tags tied up with some Divine Twine, it’s a perfect gift for a new mom!! What is your favorite new mom craft project?
Posted by JReneeMiles at 2:21 PM 0 comments
http://deliacreates.blogspot.com/2011/07/pink-lip-balm.html
HOW TO MAKE LIP BALM FROM http://deliacreates.blogspot.com/2011/07/pink-lip-balm.html
Today I'm going to share a spin off my beeswax lip gloss. Instead of gloss, today we are going to make:
The key is the amount of beeswax you include. The more you put in, the less glossy and the more firm and balmy it gets.
The great thing about beeswax is that it has natural sun protection qualities. I can't quantify how much exactly, but any little bit helps when you're in the sun all day in the summer time!
As you can tell...I haven't been in the sun much yet. As...I am still white as a whitey tidey. :) But it won't be long!
Disclaimer: This recipe is just me experimenting and sharing what I did with you. I am not a professional. If you plan on selling your lip balm you might want to get a kit or find a more professional recipe.
Alright... let's get started.
Gather your supplies:
2 Tablespoons of grated beeswax
Grate it with a dollar store or old cheese grater. You will never be able to use it for anything else after you grate beeswax on it.
1 Tablespoon Coconut Oil {the kind you cook with}
2 teaspoons sweet almond oil
A chunk of some red lipstick.
How much depends on your preference. Just keep in mind that it will look dark in the pot but won't be that dark on. A lot of color goes a little way.
1/2 teaspoon of shimmery eye shadow - to add some subtle sparkle.
- Boil water in a small sauce pan and rest a metal bowl on top - to make a double boiler. Or with a small metal bowl in a larger pan of boiling water to give it more of a "water bath."
- Melt all the ingredients together until it liquefies and there are no more visible beeswax flakes. Then immediately remove it from the heat. You don't want to overcook it or boil it. It will not last as long {get grainy and rancid} if you do.
- Use a bamboo skewer or other throw way tool, to stir it.
- Off heat, stir in 10 drops or so of essential oil. I used peppermint but lemon or orange would be so yummy for summer.
You add the essentail oil at this stage so that it doesn't completey evaporate away during cooking.
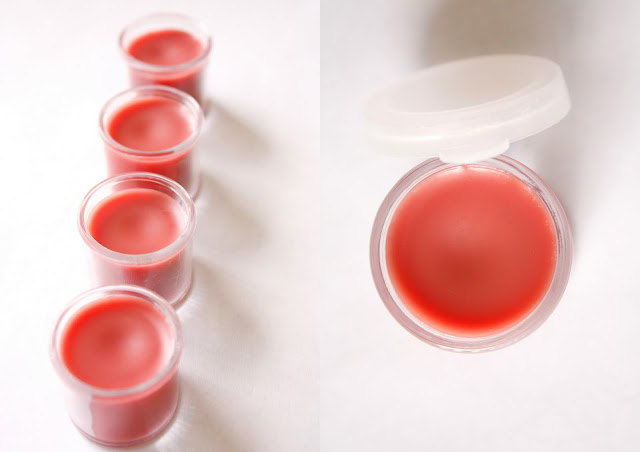
- Then using a disposable medicine dropper fill your lip gloss containers. You can pour it instead, but this helps it look cleaner.
- Let it sit at room temperature or in the fridge {speeds things up} for a couple of hours so that it completely hardens and turns opaque.
And now you have a soothing, smooth lip balm with just a hint of color and a hint of sun protection.
Pink Tinted Lip Balm
2 TBSP grated beeswax
2 TBSP coconut oil
2 tsp. sweet almond oil
chunk of red lipstick
1/2 tsp. of shimmery eye shadow powder
10 drops of essentail oil (I used peppermint but you can use any kind)
Melt all but essentail oil in a doubleboiler until completely melted and there are no more beewax flakes.
Do not boil or overheat. Stir with a throw away tool like a bamboo skewer.
Remove from heat and add essential oil. Using a syringe or medicne dropper fill your lip balm containers.
Let it sit at room temperature or in the fridge until hardened or opaque.
And here is a
facts and tips section
facts and tips section
to explain everything you might be wondering:
Versatility of ingredients:
Feel free to change the ratios of the ingredients and play around with it. The more coconut oil and sweet almond oil you use, the more glossy it will be. The more essential oils you add, the more potent the smell. Add glitter...the possibilities are endless fun.
Where do you get beeswax?
I got mine from a bee keeper. I found my bee keeper by calling an exterminator. They often use bee keepers to remove and relocate pesky beehives.
Where do you get the rest of the ingredients?
The essential oil and the sweet almond oil came from the health/organic food section of my Smith's Marketplace grocery store. Any health food store should also carry them. The coconut oil came from the cooking oils section of my local Walmart.
Containers:
I got mine from the dollar store in the craft section. They were sold as empty containers and looked much like little paint pots. You can order more traditional looking containers online, but it is only economical if you order in bulk. Craft stores like Hobby Lobby and Michael's only carry them in their kits {at least where I live} so you can do that as well.
I....am cheap. So I used these cute little pots and I'm happy with them. :)
Have more questions? You can email me or check out my lip gloss tutorial for more information. I made the gloss a little differently than this balm. The more I make balms, and glosses, the more I realize that this process is fairly flexible.
Posted by JReneeMiles at 2:13 PM 0 comments
Subscribe to:
Comments (Atom)


